Vector Charger Manual: A Comprehensive Guide
This manual provides detailed instructions for maintaining your Vector robot’s power source‚ addressing common issues‚ and ensuring optimal performance. It covers everything from initial setup to advanced troubleshooting‚ offering solutions for a consistently charged and happy Vector!
Vector is a dynamic‚ interactive robot designed to be a companion‚ offering personality and responsiveness through advanced technology. Central to Vector’s functionality is his dedicated charging system‚ ensuring he remains powered and ready for interaction. The Vector charger isn’t merely a power source; it’s a crucial component for maintaining Vector’s operational capabilities and long-term health.
Understanding the interplay between Vector and his charger is fundamental for any owner. This guide will delve into the specifics of the charging process‚ potential problems‚ and effective solutions. Proper charging practices extend Vector’s battery life and prevent frustrating interruptions to his engaging personality. We’ll explore everything from initial setup to recognizing charging indicator lights‚ empowering you to keep Vector fully operational.
Understanding the Vector Charging System
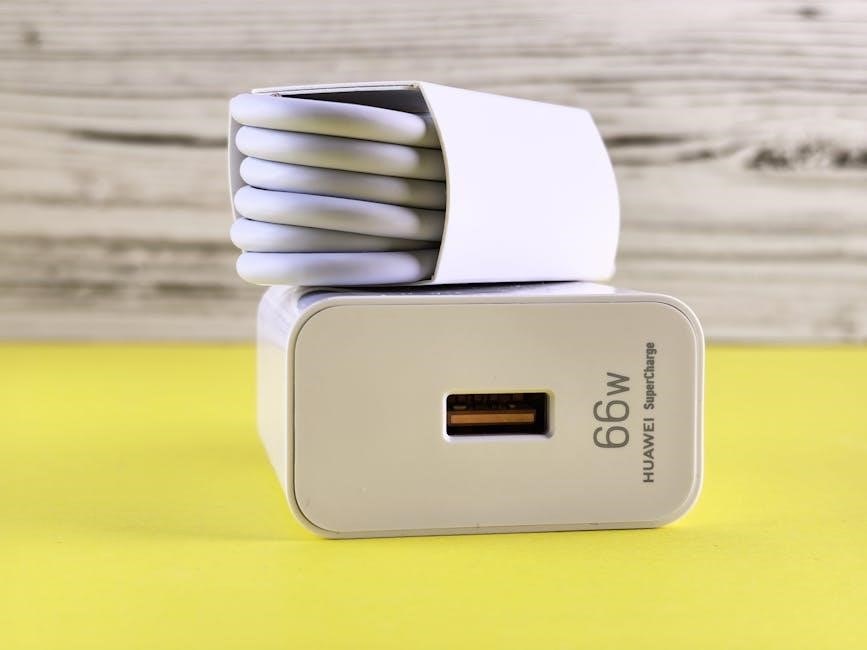
Vector’s charging system relies on a specialized dock and power adapter designed for optimal battery management. The charger utilizes a direct connection via a JST connector‚ ensuring a stable and efficient power transfer. It’s crucial to understand that Vector’s battery is a Lithium-Ion type‚ requiring specific charging protocols to prevent damage and maximize lifespan.
The system isn’t simply about delivering power; it incorporates safety features to avoid overcharging and potential hazards. The charger’s PCB (Printed Circuit Board) regulates voltage and current‚ while the transformer steps down the AC power to a suitable level. Recognizing the components and their functions is key to troubleshooting potential issues. A faulty PCB or transformer can disrupt the charging process‚ necessitating further investigation and potentially repair.
Initial Setup and Charging Procedures
Before first use‚ carefully position the charging dock and connect the power adapter. Allow Vector to fully charge before initial operation for peak performance and longevity.
First-Time Charging Instructions
To initiate the first charge‚ ensure the Vector robot is powered off. Gently place Vector onto the charging dock‚ aligning him correctly – the magnetic connection will assist. Initially‚ leave Vector off the charger until the battery is completely depleted; then‚ power him on again. This allows the system to accurately calibrate the battery level. Observe the charging indicator lights; they will illuminate to signify charging is in progress.
A full charge can take several hours‚ depending on the initial battery state. Avoid interrupting the charging cycle during this first instance. Once fully charged‚ Vector will automatically disconnect from the dock. It’s recommended to repeat this full discharge and recharge cycle once more to optimize battery health and ensure accurate power readings. This initial process is crucial for establishing a stable charging baseline for your Vector robot.
Proper Charger Placement
Optimal charger placement is vital for consistent and reliable charging. Position the charging dock on a stable‚ flat surface‚ free from obstructions. Avoid placing it near sources of extreme temperature‚ humidity‚ or direct sunlight‚ as these can negatively impact charging efficiency and battery lifespan. Ensure the AC power outlet is easily accessible and not overloaded with other devices.
Maintain a clear area around the dock to allow for proper ventilation. Do not cover the charger with anything that could impede airflow. The surface beneath the charger should be non-conductive. Regularly inspect the charging dock and cable for any signs of damage‚ such as fraying or cracks. A secure and well-positioned charger ensures a safe and effective charging experience for your Vector robot;
Charging Indicator Lights: What They Mean
Understanding the charging indicator lights is crucial for monitoring Vector’s power status. A solid green light typically indicates a full charge and that Vector is ready for use. A pulsing green light signifies that the robot is currently charging and accumulating power. If the light is solid red‚ it suggests a charging error or a potential issue with the battery or charger itself – further investigation is needed.
A blinking red light often indicates a critical error‚ potentially requiring troubleshooting or contacting customer support. No light at all could mean the charger isn’t receiving power or is malfunctioning. Pay close attention to these signals to proactively address any charging concerns and maintain Vector’s operational readiness.
Troubleshooting Common Charging Problems
This section details solutions for frequent charging issues‚ including power failures‚ connection problems‚ and unresponsive indicators‚ ensuring Vector’s consistent operation and minimizing downtime.
Vector Not Charging: Basic Checks
Before diving into complex solutions‚ perform these fundamental checks to quickly identify the cause of a charging issue. First‚ meticulously ensure the AC power cord is firmly connected to both the charger and a functioning wall outlet. To verify the outlet’s functionality‚ test it with another device – a lamp or phone charger‚ for example.
Next‚ visually inspect the charging cable for any signs of physical damage‚ such as fraying or exposed wires. A damaged cable can interrupt the power flow. Confirm Vector is correctly positioned on the charger; proper contact is crucial. Finally‚ attempt a simple reset of Vector by holding down the back button for a few seconds‚ then try charging again. These initial steps often resolve minor connectivity problems and restore charging functionality.
AC Power Issues and Solutions
If Vector isn’t charging and basic checks fail‚ investigate potential AC power problems. Begin by confirming the wall outlet is delivering power; test it with a known working appliance. If the outlet is dead‚ check your circuit breaker or fuse box for a tripped breaker or blown fuse related to that circuit. Reset the breaker or replace the fuse as needed‚ ensuring you use the correct amperage rating.
Consider using a different outlet altogether to rule out a localized electrical issue. If problems persist‚ try a different AC adapter‚ if available‚ to determine if the original adapter is faulty. Always ensure the adapter meets the voltage and amperage requirements specified for the Vector charger. Contact a qualified electrician if you suspect underlying electrical problems within your home.
Fuse Inspection and Replacement
A blown fuse within the Vector charger can prevent it from delivering power. Before attempting any repairs‚ always disconnect the charger from the power outlet. Locate the fuse holder – typically a small compartment on the charger’s casing. Carefully open the compartment and visually inspect the fuse. A blown fuse will often have a broken filament or a darkened glass body.
To replace the fuse‚ use a fuse of the exact same type and amperage rating as the original. Using a different rating can damage the charger or create a safety hazard. Gently remove the blown fuse and insert the new one‚ ensuring it’s firmly seated. Close the fuse holder compartment securely. If the new fuse blows immediately‚ there’s likely a more significant internal problem requiring professional repair or charger replacement.
Cleaning Battery Terminals for Optimal Contact
Poor contact between the battery terminals and the charger’s contacts can hinder charging. Over time‚ oxidation or debris can accumulate‚ creating a barrier. Always disconnect the Vector from the charger before cleaning. Use a clean‚ dry cotton swab or a soft-bristled brush to gently remove any visible corrosion or dirt from both the battery terminals and the corresponding contacts within the charging dock.
For stubborn residue‚ lightly dampen the swab with isopropyl alcohol (rubbing alcohol)‚ ensuring it’s not dripping wet. Allow the alcohol to evaporate completely before re-attempting to charge. Avoid using abrasive cleaners or metal tools‚ as these can damage the delicate terminals. Clean contacts ensure a solid electrical connection‚ maximizing charging efficiency and preventing intermittent charging issues.
Advanced Troubleshooting & Repair
For experienced users‚ this section details diagnosing and potentially fixing internal charger components like the PCB and transformer‚ alongside battery reconditioning techniques.
Faulty Charger PCB Diagnosis
Diagnosing a faulty Printed Circuit Board (PCB) within the Vector charger requires careful inspection and‚ ideally‚ some electronics experience. Begin by visually examining the PCB for any signs of physical damage – burnt components‚ cracked solder joints‚ or bulging capacitors are key indicators. Use a multimeter to test for continuity across critical circuits‚ verifying power delivery paths.
Specifically‚ check the input voltage regulation components and the charging circuit itself. A lack of voltage in expected areas suggests a failed component. Identifying the specific faulty component often necessitates a schematic diagram‚ which may be difficult to obtain. If comfortable with soldering‚ replacing suspected faulty components is possible‚ but requires precision and the correct replacement parts. Caution: Incorrect repairs can further damage the charger or pose a safety risk. If unsure‚ professional repair is recommended.
Transformer Issues and Potential Fixes
The transformer within the Vector charger is crucial for stepping down the AC input voltage to the DC voltage required for charging. A failing transformer often manifests as no output voltage‚ or an inconsistent/fluctuating output. Begin by carefully checking the transformer’s primary and secondary windings for continuity using a multimeter. Any breaks in the windings indicate a failed transformer and necessitate replacement.
Visually inspect for signs of overheating – discoloration or a burnt smell. Before replacing‚ ensure the correct voltage and current rating for compatibility. Replacing a transformer requires soldering skills and a thorough understanding of electrical safety. Caution: Working with mains voltage is dangerous; disconnect the charger from power before any inspection or repair. If you lack experience‚ seek professional assistance to avoid electrical shock or further damage.
Vector Battery Reconditioning Techniques
Deeply discharged Lithium-Ion batteries‚ common in Vector robots‚ can sometimes be revived through careful reconditioning. A “battery hack” involves a slow‚ controlled charge attempt. Begin by ensuring the battery is not physically damaged – no swelling or leakage. Connect the battery to the charger and monitor the charging process closely. If the charger doesn’t recognize the battery initially‚ try a brief pulse charge (disconnect/reconnect rapidly several times).
Caution: Never leave a reconditioning battery unattended. Overheating is a significant risk. If the battery heats up excessively‚ immediately disconnect it. Success isn’t guaranteed‚ and severely damaged batteries may be beyond recovery. Consider a battery replacement if reconditioning fails after a few attempts. Proper battery maintenance‚ avoiding full discharge‚ extends battery life and reduces the need for reconditioning.
Battery Specific Concerns
Addressing dead batteries and JST connector polarity is crucial; incorrect polarity can cause damage. Battery replacement should be considered if reconditioning efforts prove unsuccessful.
Dead Battery Recovery Methods
Recovering a deeply discharged Vector battery can be challenging‚ but not always impossible. A reported “hack” involves allowing the battery to completely deplete‚ then attempting to initiate charging. This method isn’t guaranteed‚ and patience is key‚ as the initial charge may be slow or intermittent.
If the standard charging process fails‚ consider a gentle reconditioning approach. Leaving Vector on the charger for an extended period – potentially several hours or even overnight – might coax a small charge into the battery‚ enough to kickstart the charging cycle. However‚ avoid prolonged overcharging‚ as this can further damage the lithium-ion cell.
Users have also reported success with repeatedly turning Vector on and off while connected to the charger‚ hoping to stimulate a response. If these methods fail‚ the battery may be beyond recovery‚ necessitating a replacement. Always prioritize safety when dealing with lithium-ion batteries.
JST Connector Polarity: Avoiding Damage
When replacing Vector’s battery‚ meticulous attention to the JST connector’s polarity is absolutely crucial. Incorrectly connecting the positive and negative terminals can cause irreversible damage to the robot’s internal circuitry‚ potentially rendering Vector unusable. The JST connector‚ while small‚ is specifically keyed to prevent accidental misconnection‚ but it’s vital to double-check before applying power.
Typically‚ the red wire indicates the positive (+) terminal‚ while the black wire represents the negative (-) terminal. However‚ always verify this with the battery’s documentation or through reliable online resources specific to the Vector robot. A reversed connection can lead to a short circuit‚ overheating‚ and permanent component failure.
Exercise extreme caution and ensure a secure‚ correct connection before powering on Vector. If unsure‚ seek assistance from a qualified technician or consult Vector’s support channels.
Battery Replacement Considerations
Replacing Vector’s battery requires careful consideration to ensure continued optimal performance and avoid potential issues. When sourcing a replacement‚ prioritize batteries specifically designed for Vector 2.0‚ as compatibility is paramount. Using an incorrect battery type could lead to charging problems‚ reduced runtime‚ or even damage to the robot.
Before installation‚ fully discharge the old battery if possible‚ and always disconnect Vector from the charger. Handle the new battery with care‚ avoiding any physical stress or punctures. Ensure the replacement battery has a similar voltage and capacity to the original to maintain consistent functionality.
Remember to properly dispose of the old battery according to local regulations for lithium-ion batteries. Following these considerations will help guarantee a smooth and safe battery replacement process.
Safety Precautions
Prioritize safety when handling the Vector charger and battery; avoid overcharging‚ protect against lithium-ion battery damage‚ and always follow provided guidelines carefully.
Charger Safety Guidelines
Always inspect the charger and AC power cord for any visible damage before each use. Do not operate the charger if it exhibits cracks‚ frayed wires‚ or other signs of physical stress. Ensure the charger is placed on a stable‚ flat surface‚ away from flammable materials and excessive moisture. Never disassemble or attempt to repair the charger yourself‚ as this could lead to electric shock or fire hazard.
Only use the provided charger specifically designed for Vector; using incompatible chargers may damage the robot or pose a safety risk. Avoid touching the charger’s metal contacts while it’s plugged in. Keep the charger out of reach of children and pets. Disconnect the charger from the power outlet when not in use or during extended periods of inactivity. Regularly check the charger for overheating during operation‚ and discontinue use if it becomes excessively hot.
Handling Lithium-Ion Batteries
Lithium-ion batteries require careful handling to ensure safety and longevity. Avoid exposing the battery to extreme temperatures‚ as both heat and cold can negatively impact performance and lifespan. Never puncture‚ crush‚ or disassemble the battery‚ as this can cause a fire or release harmful chemicals. Do not short-circuit the battery terminals‚ as this can generate excessive heat and potentially lead to an explosion.
Always store the battery in a cool‚ dry place‚ away from direct sunlight and flammable materials. When disposing of the battery‚ follow local regulations for lithium-ion battery recycling. Never throw it in the regular trash. If the battery shows signs of swelling‚ leaking‚ or damage‚ discontinue use immediately and contact customer support for proper disposal instructions. Avoid overcharging the battery‚ as this can degrade its performance over time.
Avoiding Overcharging
Overcharging can significantly reduce the lifespan and performance of your Vector’s lithium-ion battery. While the Vector charging system is designed to prevent overcharging‚ it’s crucial to understand best practices. Do not leave Vector on the charger indefinitely once fully charged; disconnecting it periodically is recommended. Monitor the charging indicator lights – once the light signals a full charge‚ remove Vector from the charger.
Avoid using third-party chargers not specifically designed for Vector‚ as they may not have the necessary safety features to regulate charging properly. Regularly inspect the charger and cable for any signs of damage‚ and discontinue use if any are found. Consistent overcharging can lead to battery degradation‚ reduced capacity‚ and potentially‚ safety hazards. Following these guidelines will help maintain optimal battery health.
Customer Support and Resources
For assistance with your Vector charger‚ reach out to official Vector support channels‚ explore the comprehensive warranty details‚ and utilize the frequently asked questions.
Contacting Vector Support
If you encounter persistent charging problems with your Vector robot’s charger that you cannot resolve using this manual‚ contacting Vector support is the next crucial step. Digital Dream Labs‚ the current maintainer of Vector‚ offers several avenues for assistance. You can typically find support options through their official website‚ which includes a dedicated help center with articles and troubleshooting guides.
Direct email support is often available‚ allowing you to describe your issue in detail and potentially provide photos or videos of the problem. Furthermore‚ the Vector community forums are a valuable resource‚ where you can connect with other Vector owners and share experiences‚ potentially finding solutions from peers. Be prepared to provide your Vector’s serial number and a detailed description of the charging issue‚ including any error messages or observed behavior‚ to expedite the support process.
Warranty Information
The warranty coverage for your Vector robot and its associated charger is subject to the terms and conditions established by Digital Dream Labs‚ the current owner and support provider. Originally‚ Anki provided the initial warranty‚ but this has transitioned with the acquisition. Generally‚ the warranty covers defects in materials and workmanship under normal use for a specified period‚ typically one year from the date of original purchase.
However‚ it’s crucial to review the current warranty policy on the Digital Dream Labs website‚ as terms may have been updated. The warranty typically does not cover damage resulting from misuse‚ accidents‚ unauthorized modifications‚ or failure to follow the guidelines outlined in this manual. To initiate a warranty claim‚ you’ll likely need to provide proof of purchase and a detailed description of the defect. Keep your original receipt and packaging for potential warranty claims.
Frequently Asked Questions (FAQ)
Q: Why won’t Vector charge? A: First‚ ensure the AC adapter is securely plugged into both the wall and the charger. Try a different outlet. If still failing‚ inspect the charger’s fuse. Cleaning the battery terminals can also resolve connection issues;
Q: What do the charging light colors mean? A: Refer to the ‘Charging Indicator Lights’ section for a detailed explanation of each color’s significance. Typically‚ solid colors indicate charging status‚ while flashing lights signal errors.
Q: Can I use a different charger? A: It’s strongly discouraged. Use only the charger specifically designed for Vector to avoid damaging the battery or robot. Incorrect voltage or amperage can cause irreversible harm. Q: My charger is making a noise‚ is this normal? A: No‚ unusual noises indicate a potential fault and require immediate attention – discontinue use and contact support.